Cómo traducir correctamente una aplicación React usando i18next
Translation into Spanish of an interesting article by Adriano Raiano, bachelor in computer science, software architect, and founder of locize.com,
 27 April, 2022 Translate react app with i18n
A free translation by Chema, a Spain-based translator specializing in English to Spanish translations of software and apps
An original text written by Adriano Raiano, originally published in
https://locize.com/blog/how-to-internationalize-react-i18next/
* * *
Ayudar a superar la barrera del idioma a los usuarios que utilizan un software es algo muy importante. El inglés ya no es el idioma universal de Internet. En marzo de 2020, solo el 25,9 % de los usuarios de Internet hablaban inglés. Hay muchas posibilidades de que tus usuarios pasen por alto tu sitio web si no está traducido y localizado. Si no tienes un sitio web multilingüe, estás perdiendo una gran parte de tus usuarios o clientes potenciales.
En el ecosistema de JavaScript, hay muchos frameworks de internacionalización. Aquí puedes encontrar detalles sobre algunos frameworks de JavaScript. En este artículo, usaremos i18next para internacionalizar una aplicación React.js.
Indice
- Antes que nada: “¿Por qué i18next?”
- Entramos en materia
- Requisitos previos
- Empezamos
- Conmutador de idioma
- Interpolación y Pluralización
- Formateo
- Contexto
- Separar las traducciones del código
- Mejor gestión de la traducción
- ¡Con seguridad!
- ¿Cómo se ve esto?
- Guardar traducciones faltantes
- 👀 Aun hay más…
- 📦 Preparación para producción 🚀
- 🎉🥳 Felicidades 🎊🎁
Antes que nada: “¿Por qué i18next?”
Cuando se trata de la localización de React, uno de los frameworks más populares es i18next con su extensión react-i18next, y con razón!
i18next se creó a fines de 2011. Es más antigua que la mayoría de las bibliotecas que usas hoy en día, incluido react, vue, etc.
➡️ sostenible
Dado el tiempo que i18next ya está disponible en código abierto, no hay un caso real de i18n que no pueda resolverse con i18next.
➡️ maduro
i18next se puede usar en cualquier entorno javascript (y algunos que no son javascript: .net, elm, iOS, android, ruby, …), con cualquier framwork de usuario, con cualquier formato i18n, … las posibilidades son infinitas .
➡️ extensible
Con i18next podrás usar más funciones que con otros frameworks de internacionalización.
➡️ potente
Aquí puedes encontrar más información sobre por qué i18next es tan especial y cómo funciona .
Entramos en materia
Requisitos previos
Asegúrate de tener Node.js y npm instalados. Es bueno tener algo de experiencia con HTML , JavaScript y React.js, antes de saltar a react-i18next .
Empezamos
Usa tu propio proyecto React o crea uno nuevo con create-react-app.
npx create-react-app my-app
Vamos a adaptar la app para que detecte el idioma según la preferencia del usuario.
Y crearemos un conmutador de idioma para que el contenido cambie entre diferentes idiomas.
Instalamos algunas dependencias de i18next:
npm install i18next react-i18next i18next-browser-languagedetector
Preparamos un archivo i18n.js:
import i18n from 'i18next';
import { initReactI18next } from 'react-i18next';
import LanguageDetector from 'i18next-browser-languagedetector';

i18n
  // detect user language
  // learn more: https://github.com/i18next/i18next-browser-languageDetector
  .use(LanguageDetector)
  // pass the i18n instance to react-i18next.
  .use(initReactI18next)
  // init i18next
  // for all options read: https://www.i18next.com/overview/configuration-options
  .init({
    debug: true,
    fallbackLng: 'en',
    interpolation: {
      escapeValue: false, // not needed for react as it escapes by default
    },
    resources: {
      en: {
        translation: {
          // here we will place our translations...
        }
      }
    }
  });

export default i18n;
Importamos ese archivo en algún lugar de nuestro archivo index.js:
Para React >= 18.0.0 usamos:
import React from 'react';
import { createRoot } from 'react-dom/client';
import './index.css';
import App from './App';

// import i18n (needs to be bundled ;))
import './i18n';

const root = createRoot(document.getElementById('root'))
root.render(
  <React.StrictMode>
    <App />
  </React.StrictMode>
);
Para versiones anteriores de React usamos:
import React from 'react';
import ReactDOM from 'react-dom';
import './index.css';
import App from './App';

// import i18n (needs to be bundled ;))
import './i18n';

ReactDOM.render(
  <React.StrictMode>
    <App />
  </React.StrictMode>,
  document.getElementById('root')
);
Ahora intentemos mover un texto codificado de forma rígida a las traducciones.
Hemos usado el componente Trans para el primer texto y el
useTranslation hook para el segundo texto:
import logo from './logo.svg';
import './App.css';
import { useTranslation, Trans } from 'react-i18next';

function App() {
  const { t } = useTranslation();

  return (
    <div className="App">
      <header className="App-header">
        <img src={logo} className="App-logo" alt="logo" />
        <p>
          <Trans i18nKey="description.part1">
            Edit <code>src/App.js</code> and save to reload.
          </Trans>
        </p>
        <a
          className="App-link"
          href="https://reactjs.org"
          target="_blank"
          rel="noopener noreferrer"
        >
          {t('description.part2')}
        </a>
      </header>
    </div>
  );
}

export default App;
Los textos ahora son parte de los recursos de traducción:
import i18n from 'i18next';
import { initReactI18next } from 'react-i18next';
import LanguageDetector from 'i18next-browser-languagedetector';

i18n
  // detect user language
  // learn more: https://github.com/i18next/i18next-browser-languageDetector
  .use(LanguageDetector)
  // pass the i18n instance to react-i18next.
  .use(initReactI18next)
  // init i18next
  // for all options read: https://www.i18next.com/overview/configuration-options
  .init({
    debug: true,
    fallbackLng: 'en',
    interpolation: {
      escapeValue: false, // not needed for react as it escapes by default
    },
    resources: {
      en: {
        translation: {
          description: {
            part1: 'Edit <1>src/App.js</1> and save to reload.',
            part2: 'Learn React'
          }
        }
      }
    }
  });

export default i18n;
Conmutador de idioma
Ahora definimos un conmutador de idioma:
import logo from './logo.svg';
import './App.css';
import { useTranslation, Trans } from 'react-i18next';

const lngs = {
  en: { nativeName: 'English' },
  de: { nativeName: 'Deutsch' }
};

function App() {
  const { t, i18n } = useTranslation();

  return (
    <div className="App">
      <header className="App-header">
        <img src={logo} className="App-logo" alt="logo" />
        <div>
          {Object.keys(lngs).map((lng) => (
            <button key={lng} style={{ fontWeight: i18n.resolvedLanguage === lng ? 'bold' : 'normal' }} type="submit" onClick={() => i18n.changeLanguage(lng)}>
              {lngs[lng].nativeName}
            </button>
          ))}
        </div>
        <p>
          <Trans i18nKey="description.part1">
            Edit <code>src/App.js</code> and save to reload.
          </Trans>
        </p>
        <a
          className="App-link"
          href="https://reactjs.org"
          target="_blank"
          rel="noopener noreferrer"
        >
          {t('description.part2')}
        </a>
      </header>
    </div>
  );
}

export default App;
Y también agregamos algunas traducciones para el nuevo idioma:
import i18n from 'i18next';
import { initReactI18next } from 'react-i18next';
import LanguageDetector from 'i18next-browser-languagedetector';

i18n
  // detect user language
  // learn more: https://github.com/i18next/i18next-browser-languageDetector
  .use(LanguageDetector)
  // pass the i18n instance to react-i18next.
  .use(initReactI18next)
  // init i18next
  // for all options read: https://www.i18next.com/overview/configuration-options
  .init({
    debug: true,
    fallbackLng: 'en',
    interpolation: {
      escapeValue: false, // not needed for react as it escapes by default
    },
    resources: {
      en: {
        translation: {
          description: {
            part1: 'Edit <1>src/App.js</1> and save to reload.',
            part2: 'Learn React'
          }
        }
      },
      de: {
        translation: {
          description: {
            part1: 'Ändere <1>src/App.js</1> und speichere um neu zu laden.',
            part2: 'Lerne React'
          }
        }
      }
    }
  });

export default i18n;

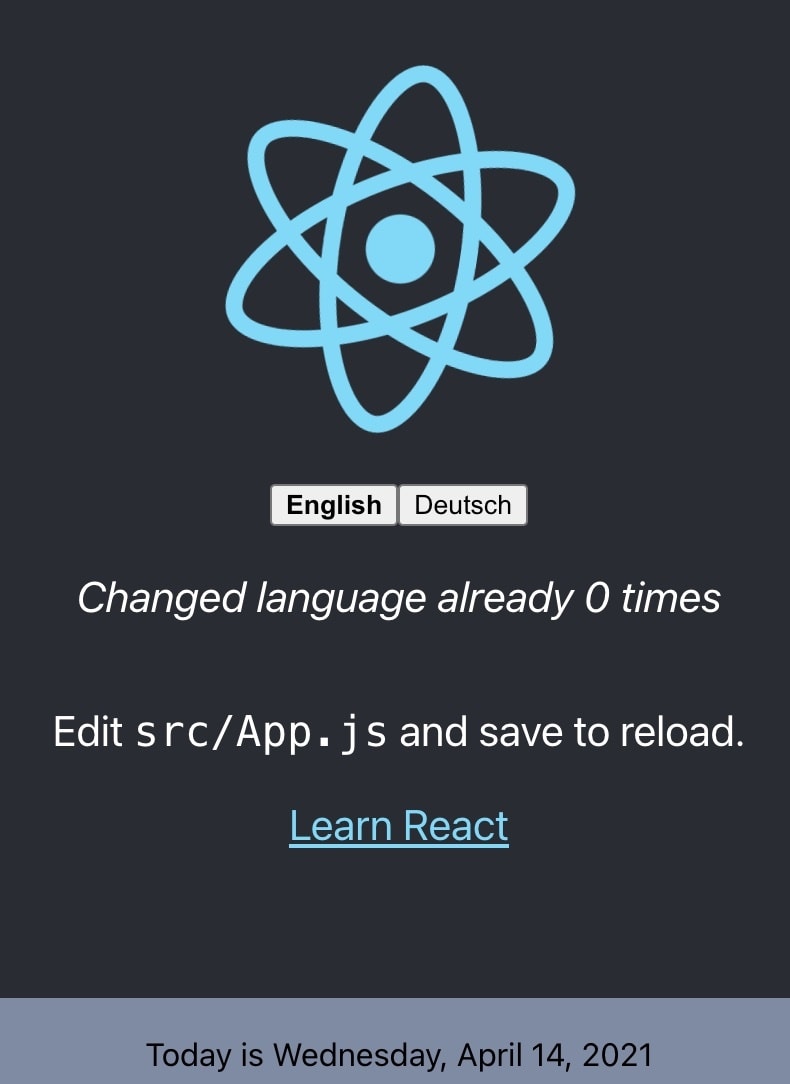
🥳 Genial, ¡acabas de crear tu primer conmutador de idiomas!
Gracias a i18next-browser-languagedetector ahora intenta detectar el idioma del navegador y automáticamente usa ese idioma si le proporcionaste las traducciones. El idioma seleccionado manualmente en el conmutador de idioma se mantiene en el almacenamiento local; la próxima vez que alguien visite la página, ese idioma se utilizará como idioma preferido.
Interpolación y Pluralización
i18next va más allá de proporcionar las características estándar de i18n.
Pero seguro que es capaz de manejar plurales e interpolaciones .
Contemos cada vez que se cambia el idioma:
import logo from './logo.svg';
import './App.css';
import { useTranslation, Trans } from 'react-i18next';
import { useState } from 'react';

const lngs = {
  en: { nativeName: 'English' },
  de: { nativeName: 'Deutsch' }
};

function App() {
  const { t, i18n } = useTranslation();
  const [count, setCounter] = useState(0);

  return (
    <div className="App">
      <header className="App-header">
        <img src={logo} className="App-logo" alt="logo" />
        <div>
          {Object.keys(lngs).map((lng) => (
            <button key={lng} style={{ fontWeight: i18n.resolvedLanguage === lng ? 'bold' : 'normal' }} type="submit" onClick={() => {
              i18n.changeLanguage(lng);
              setCounter(count + 1);
            }}>
              {lngs[lng].nativeName}
            </button>
          ))}
        </div>
        <p>
          <i>{t('counter', { count })}</i>
        </p>
        <p>
          <Trans i18nKey="description.part1">
            Edit <code>src/App.js</code> and save to reload.
          </Trans>
        </p>
        <a
          className="App-link"
          href="https://reactjs.org"
          target="_blank"
          rel="noopener noreferrer"
        >
          {t('description.part2')}
        </a>
      </header>
    </div>
  );
}

export default App;
…y ampliando los recursos de traducción:
import i18n from 'i18next';
import { initReactI18next } from 'react-i18next';
import LanguageDetector from 'i18next-browser-languagedetector';

i18n
  // detect user language
  // learn more: https://github.com/i18next/i18next-browser-languageDetector
  .use(LanguageDetector)
  // pass the i18n instance to react-i18next.
  .use(initReactI18next)
  // init i18next
  // for all options read: https://www.i18next.com/overview/configuration-options
  .init({
    debug: true,
    fallbackLng: 'en',
    interpolation: {
      escapeValue: false, // not needed for react as it escapes by default
    },
    resources: {
      en: {
        translation: {
          description: {
            part1: 'Edit <1>src/App.js</1> and save to reload.',
            part2: 'Learn React'
          },
          counter_one: 'Changed language just once',
          counter_other: 'Changed language already {{count}} times'
        }
      },
      de: {
        translation: {
          description: {
            part1: 'Ändere <1>src/App.js</1> und speichere um neu zu laden.',
            part2: 'Lerne React'
          },
          counter_one: 'Die Sprache wurde erst ein mal gewechselt',
          counter_other: 'Die Sprache wurde {{count}} mal gewechselt'
        }
      }
    }
  });

export default i18n;
Según el valor de conteo, i18next elegirá la forma plural correcta.
+ info sobre pluralización e interpolación en la documentación oficial de i18next .

💡 i18next también puede manejar idiomas con múltiples formas plurales, como el árabe:
// translation resources:
{
  "key_0": "zero",
  "key_1": "singular",
  "key_2": "two",
  "key_3": "few",
  "key_4": "many",
  "key_5": "other"
}

// usage:
t('key', {count: 0}); // -> "zero"
t('key', {count: 1}); // -> "singular"
t('key', {count: 2}); // -> "two"
t('key', {count: 3}); // -> "few"
t('key', {count: 4}); // -> "few"
t('key', {count: 5}); // -> "few"
t('key', {count: 11}); // -> "many"
t('key', {count: 99}); // -> "many"
t('key', {count: 100}); // -> "other"
Formateo
Ahora, veamos cómo podemos usar diferentes formatos de fecha con la ayuda de i18next y Luxon para manejar la fecha y la hora.
npm install luxon
Nos gusta tener un pie de página que muestre la fecha actual:
import './Footer.css';

const Footer = ({ t }) => (
  <div className="Footer">
    <div>{t('footer.date', { date: new Date() })}</div>
  </div>
);

export default Footer;

// imported in our App.js and used like this
// <Footer t={t} />
Importamos luxon y definimos una función de formato, como se documenta en la documentación, y agregamos la nueva clave de traducción:
import i18n from 'i18next';
import { initReactI18next } from 'react-i18next';
import LanguageDetector from 'i18next-browser-languagedetector';
import { DateTime } from 'luxon';

i18n
  // detect user language
  // learn more: https://github.com/i18next/i18next-browser-languageDetector
  .use(LanguageDetector)
  // pass the i18n instance to react-i18next.
  .use(initReactI18next)
  // init i18next
  // for all options read: https://www.i18next.com/overview/configuration-options
  .init({
    debug: true,
    fallbackLng: 'en',
    interpolation: {
      escapeValue: false, // not needed for react as it escapes by default
      // format: (value, format, lng) => { // legacy usage
      //   if (value instanceof Date) {
      //     return DateTime.fromJSDate(value).setLocale(lng).toLocaleString(DateTime[format])
      //   }
      //   return value;
      // }
    },
    resources: {
      en: {
        translation: {
          description: {
            part1: 'Edit <1>src/App.js</1> and save to reload.',
            part2: 'Learn React'
          },
          counter_one: 'Changed language just once',
          counter_other: 'Changed language already {{count}} times',
          footer: {
            date: 'Today is {{date, DATE_HUGE}}'
          }
        }
      },
      de: {
        translation: {
          description: {
            part1: 'Ändere <1>src/App.js</1> und speichere um neu zu laden.',
            part2: 'Lerne React'
          },
          counter_one: 'Die Sprache wurde erst ein mal gewechselt',
          counter_other: 'Die Sprache wurde {{count}} mal gewechselt',
          footer: {
            date: 'Heute ist {{date, DATE_HUGE}}'
          }
        }
      }
    }
  });

// new usage
i18n.services.formatter.add('DATE_HUGE', (value, lng, options) => {
  return DateTime.fromJSDate(value).setLocale(lng).toLocaleString(DateTime.DATE_HUGE)
});

export default i18n;
😎 Genial, ¡ahora tenemos un formato de fecha específico para cada idioma!
Inglés:
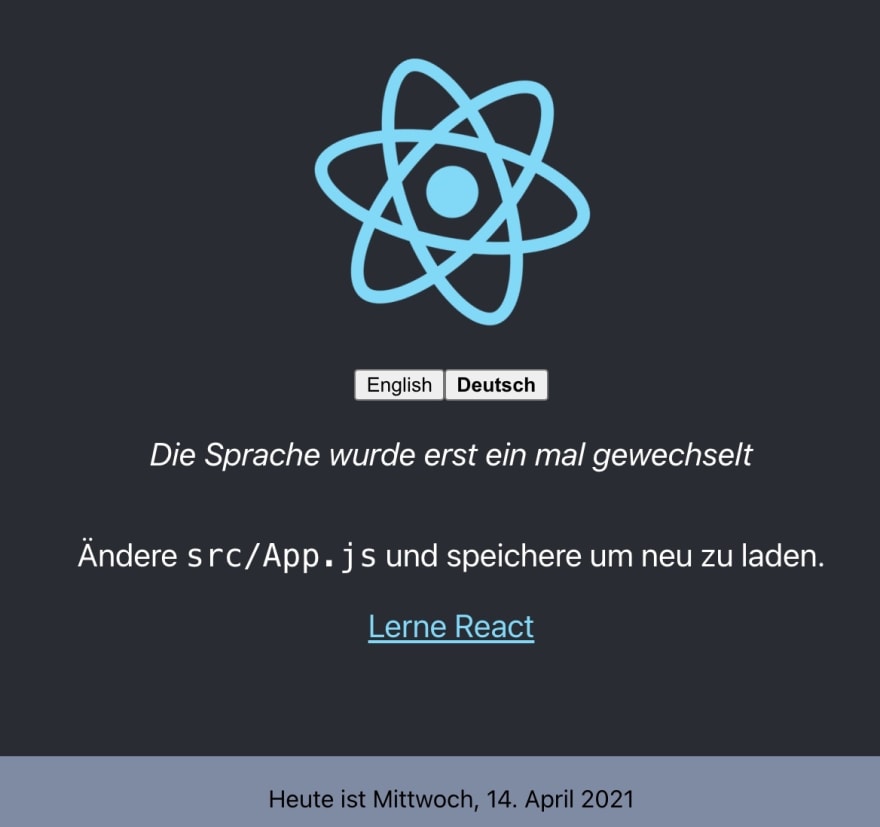
Alemán:
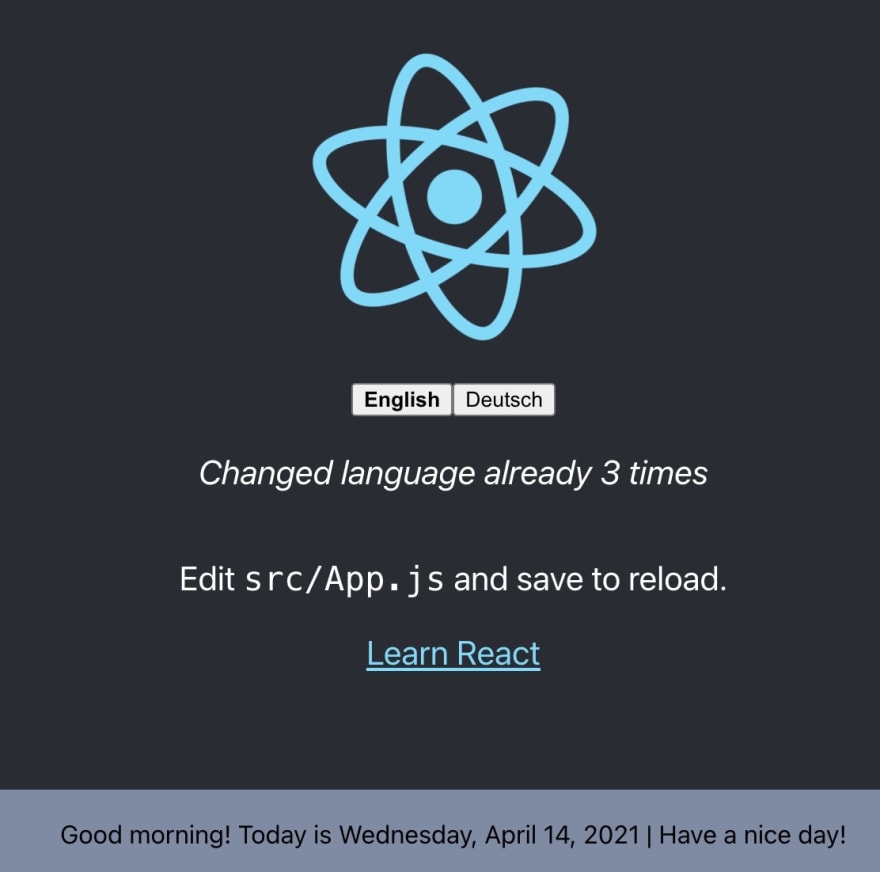
Contexto
¿Qué pasa con un mensaje de saludo específico basado en la hora del día actual? es decir, mañana, tarde, etc.
Esto es posible gracias a la función context de i18next.
Vamos a crear una función getGreetingTime y usar el resultado como información de contexto para nuestra traducción de pie de página:
import { DateTime } from 'luxon';
import './Footer.css';

const getGreetingTime = (d = DateTime.now()) => {
    const split_afternoon = 12; // 24hr time to split the afternoon
    const split_evening = 17; // 24hr time to split the evening
    const currentHour = parseFloat(d.toFormat('hh'));

    if (currentHour >= split_afternoon && currentHour <= split_evening) {
        return 'afternoon';
    } else if (currentHour >= split_evening) {
        return 'evening';
  }
    return 'morning';
}

const Footer = ({ t }) => (
  <div className="Footer">
    <div>{t('footer.date', { date: new Date(), context: getGreetingTime() })}</div>
  </div>
);

export default Footer;
Agregamos algunas claves de traducción específicas del contexto:
import i18n from 'i18next';
import { initReactI18next } from 'react-i18next';
import LanguageDetector from 'i18next-browser-languagedetector';
import Backend from 'i18next-http-backend';
import { DateTime } from 'luxon';

i18n
  // i18next-http-backend
  // loads translations from your server
  // https://github.com/i18next/i18next-http-backend
  .use(Backend)
  // detect user language
  // learn more: https://github.com/i18next/i18next-browser-languageDetector
  .use(LanguageDetector)
  // pass the i18n instance to react-i18next.
  .use(initReactI18next)
  // init i18next
  // for all options read: https://www.i18next.com/overview/configuration-options
  .init({
    debug: true,
    fallbackLng: 'en',
    interpolation: {
      escapeValue: false, // not needed for react as it escapes by default
      // format: (value, format, lng) => { // legacy usage
      //   if (value instanceof Date) {
      //     return DateTime.fromJSDate(value).setLocale(lng).toLocaleString(DateTime[format])
      //   }
      //   return value;
      // }
    },
    resources: {
      en: {
        translation: {
          description: {
            part1: 'Edit <1>src/App.js</1> and save to reload.',
            part2: 'Learn React'
          },
          counter_one: 'Changed language just once',
          counter_other: 'Changed language already {{count}} times',
          footer: {
            date: 'Today is {{date, DATE_HUGE}}',
            date_morning: 'Good morning! Today is {{date, DATE_HUGE}} | Have a nice day!',
            date_afternoon: 'Good afternoon! It\'s {{date, DATE_HUGE}}',
            date_evening: 'Good evening! Today was the {{date, DATE_HUGE}}'
          }
        }
      },
      de: {
        translation: {
          description: {
            part1: 'Ändere <1>src/App.js</1> und speichere um neu zu laden.',
            part2: 'Lerne React'
          },
          counter_one: 'Die Sprache wurde erst ein mal gewechselt',
          counter_other: 'Die Sprache wurde {{count}} mal gewechselt',
          footer: {
            date: 'Heute ist {{date, DATE_HUGE}}',
            date_morning: 'Guten Morgen! Heute ist {{date, DATE_HUGE}} | Wünsche einen schönen Tag!',
            date_afternoon: 'Guten Tag! Es ist {{date, DATE_HUGE}}',
            date_evening: 'Guten Abend! Heute war {{date, DATE_HUGE}}'
          }
        }
      }
    }
  });

// new usage
i18n.services.formatter.add('DATE_HUGE', (value, lng, options) => {
  return DateTime.fromJSDate(value).setLocale(lng).toLocaleString(DateTime.DATE_HUGE)
});

export default i18n;
😁 ¡Sí, funciona!
Separar las traducciones del código
Tener las traducciones en nuestro archivo i18n.js funciona, pero no es adecuado para trabajar con traductores.
Es mucho mejor separar las traducciones del código y colocarlas en archivos json dedicados.
Debido a que esta es una aplicación web, i18next-http-backend nos ayudará a hacerlo.
npm install i18next-http-backend
Movemos las traducciones a la carpeta pública:

Adaptamos el archivo i18n.js para usar el i18next-http-backend:
import i18n from 'i18next';
import { initReactI18next } from 'react-i18next';
import LanguageDetector from 'i18next-browser-languagedetector';
import Backend from 'i18next-http-backend';
import { DateTime } from 'luxon';

i18n
  // i18next-http-backend
  // loads translations from your server
  // https://github.com/i18next/i18next-http-backend
  .use(Backend)
  // detect user language
  // learn more: https://github.com/i18next/i18next-browser-languageDetector
  .use(LanguageDetector)
  // pass the i18n instance to react-i18next.
  .use(initReactI18next)
  // init i18next
  // for all options read: https://www.i18next.com/overview/configuration-options
  .init({
    debug: true,
    fallbackLng: 'en',
    interpolation: {
      escapeValue: false, // not needed for react as it escapes by default
      // format: (value, format, lng) => { // legacy usage
      //   if (value instanceof Date) {
      //     return DateTime.fromJSDate(value).setLocale(lng).toLocaleString(DateTime[format])
      //   }
      //   return value;
      // }
    }
  });

// new usage
i18n.services.formatter.add('DATE_HUGE', (value, lng, options) => {
  return DateTime.fromJSDate(value).setLocale(lng).toLocaleString(DateTime.DATE_HUGE)
});

export default i18n;
Ahora las traducciones se cargan de forma asíncrona, así que asegúrate de envolver tu aplicación con un componente Suspense para evitar este error:Uncaught Error: App suspended while rendering, but no fallback UI was specified.
import { Suspense } from 'react';

function App() {
  // your app's code...
}

// here app catches the suspense from page in case translations are not yet loaded
export default function WrappedApp() {
  return (
    <Suspense fallback="...is loading">
      <App />
    </Suspense>
  );
}
Ahora tu aplicación se ve igual, pero tus traducciones están separadas.
Si deseas adoptar un nuevo idioma, simplemente crea una nueva carpeta y un nuevo archivo json de traducción.
Esto te permite enviar las traducciones a traductores externos.
O si estás trabajando con un sistema de gestión de traducción, simplemente puedes sincronizar los archivos con un cli .
💡 por cierto: también puedes tener varios archivos de traducción gracias a la función de espacios de nombres de i18next
🧑💻 El código de esta primera parte se puede encontrar aquí .
Mejor gestión de la traducción
Al enviar las traducciones a algunos traductores o agencias de traducción, tienes más control y un contacto directo con ellos. Pero esto también significa más trabajo….
Esta es la forma tradicional de traducir una App. Pero ten en cuenta que enviar archivos siempre crea una sobrecarga.
¿Existe una mejor opción?
¡Con seguridad!
i18next ayuda a traducir la aplicación, y esto es genial, pero hay más.
- ¿Cómo integrar un servicio/agencia de traducción?
- ¿Cómo realizar un seguimiento del contenido nuevo o eliminado?
- ¿Cómo gestionar el control de versiones?
- ¿Cómo implementar cambios de traducción si la app no está completa?
- y mucho más…
Buscas algo como esto❓
- Fácil de integrar
- ¿Despliegue continuo? ¡ Localización continua !
- Fácil administración de archivos de traducción
- Solicitar traducciones profesionales
- Análisis y Estadísticas
- Benefíciese de nuestra red de entrega de contenido (CDN)
- Versiones de traducciones
- Traducción automática y bajo demanda
- Sin riesgos: lleva tus datos contigo
- Precios transparentes y justos
- y mucho más…

¿Cómo se ve esto?
Primero debes registrarte en locize e iniciar sesión .
Luego crea un nuevo proyecto en locize y agrega tus traducciones. Puedes agregar tus traducciones usando la cli o importando los archivos json individuales o a través de la API .
Hecho esto, vamos a reemplazar i18next-http-backend con i18next-locize-backend .
npm install i18next-locize-backend
Después de haber importado las traducciones para localizar, elimina la carpeta locales:

Adapta el archivo i18n.js para usar i18next-locize-backend y asegúrate de copiar el ID del proyecto y la clave API desde tu proyecto de localización:
import i18n from 'i18next';
import { initReactI18next } from 'react-i18next';
import LanguageDetector from 'i18next-browser-languagedetector';
import Backend from 'i18next-locize-backend';
import { DateTime } from 'luxon';

const locizeOptions = {
  projectId: '0bbc223a-9aba-4a90-ab93-ab9d7bf7f780',
  apiKey: 'aaad4141-54ba-4625-ae37-657538fe29e7', // YOU should not expose your apps API key to production!!!
  referenceLng: 'en',
};

i18n
  // i18next-locize-backend
  // loads translations from your project, saves new keys to it (saveMissing: true)
  // https://github.com/locize/i18next-locize-backend
  .use(Backend)
  // detect user language
  // learn more: https://github.com/i18next/i18next-browser-languageDetector
  .use(LanguageDetector)
  // pass the i18n instance to react-i18next.
  .use(initReactI18next)
  // init i18next
  // for all options read: https://www.i18next.com/overview/configuration-options
  .init({
    debug: true,
    fallbackLng: 'en',
    interpolation: {
      escapeValue: false, // not needed for react as it escapes by default
      // format: (value, format, lng) => { // legacy usage
      //   if (value instanceof Date) {
      //     return DateTime.fromJSDate(value).setLocale(lng).toLocaleString(DateTime[format])
      //   }
      //   return value;
      // }
    },
    backend: locizeOptions
  });

// new usage
i18n.services.formatter.add('DATE_HUGE', (value, lng, options) => {
  return DateTime.fromJSDate(value).setLocale(lng).toLocaleString(DateTime.DATE_HUGE)
});

export default i18n;
i18next-locize-backend ofrece una funcionalidad para recuperar los idiomas disponibles directamente desde locize, usémosla:
import logo from './logo.svg';
import './App.css';
import { useTranslation, Trans } from 'react-i18next';
import { useState, Suspense, useEffect } from 'react';
import Footer from './Footer'

function App() {
  const { t, i18n } = useTranslation();
  const [count, setCounter] = useState(0);

  const [lngs, setLngs] = useState({ en: { nativeName: 'English' }});

  useEffect(() => {
    i18n.services.backendConnector.backend.getLanguages((err, ret) => {
      if (err) return // TODO: handle err...
      setLngs(ret);
    });
  }, []);

  return (
    <div className="App">
      <header className="App-header">
        <img src={logo} className="App-logo" alt="logo" />
        <div>
          {Object.keys(lngs).map((lng) => (
            <button key={lng} style={{ fontWeight: i18n.resolvedLanguage === lng ? 'bold' : 'normal' }} type="submit" onClick={() => {
              i18n.changeLanguage(lng);
              setCounter(count + 1);
            }}>
              {lngs[lng].nativeName}
            </button>
          ))}
        </div>
        <p>
          <i>{t('counter', { count })}</i>
        </p>
        <p>
          <Trans i18nKey="description.part1">
            Edit <code>src/App.js</code> and save to reload.
          </Trans>
        </p>
        <a
          className="App-link"
          href="https://reactjs.org"
          target="_blank"
          rel="noopener noreferrer"
        >
          {t('description.part2')}
        </a>
      </header>
      <Footer t={t} />
    </div>
  );
}

// here app catches the suspense from page in case translations are not yet loaded
export default function WrappedApp() {
  return (
    <Suspense fallback="...is loading">
      <App />
    </Suspense>
  );
}
Guardar traducciones faltantes
Gracias al uso de la funcionalidad saveMissing, se agregan nuevas claves para localizar automáticamente, mientras se desarrolla la aplicación.
Simplemente pasa saveMissing: trueen las opciones de i18next:
import i18n from 'i18next';
import { initReactI18next } from 'react-i18next';
import LanguageDetector from 'i18next-browser-languagedetector';
import Backend from 'i18next-locize-backend';
import { DateTime } from 'luxon';

const locizeOptions = {
  projectId: '0bbc223a-9aba-4a90-ab93-ab9d7bf7f780',
  apiKey: 'aaad4141-54ba-4625-ae37-657538fe29e7', // YOU should not expose your apps API key to production!!!
  referenceLng: 'en',
};

i18n
  // i18next-locize-backend
  // loads translations from your project, saves new keys to it (saveMissing: true)
  // https://github.com/locize/i18next-locize-backend
  .use(Backend)
  // detect user language
  // learn more: https://github.com/i18next/i18next-browser-languageDetector
  .use(LanguageDetector)
  // pass the i18n instance to react-i18next.
  .use(initReactI18next)
  // init i18next
  // for all options read: https://www.i18next.com/overview/configuration-options
  .init({
    debug: true,
    fallbackLng: 'en',
    interpolation: {
      escapeValue: false, // not needed for react as it escapes by default
      // format: (value, format, lng) => { // legacy usage
      //   if (value instanceof Date) {
      //     return DateTime.fromJSDate(value).setLocale(lng).toLocaleString(DateTime[format])
      //   }
      //   return value;
      // }
    },
    backend: locizeOptions,
    saveMissing: true
  });

// new usage
i18n.services.formatter.add('DATE_HUGE', (value, lng, options) => {
  return DateTime.fromJSDate(value).setLocale(lng).toLocaleString(DateTime.DATE_HUGE)
});

export default i18n;
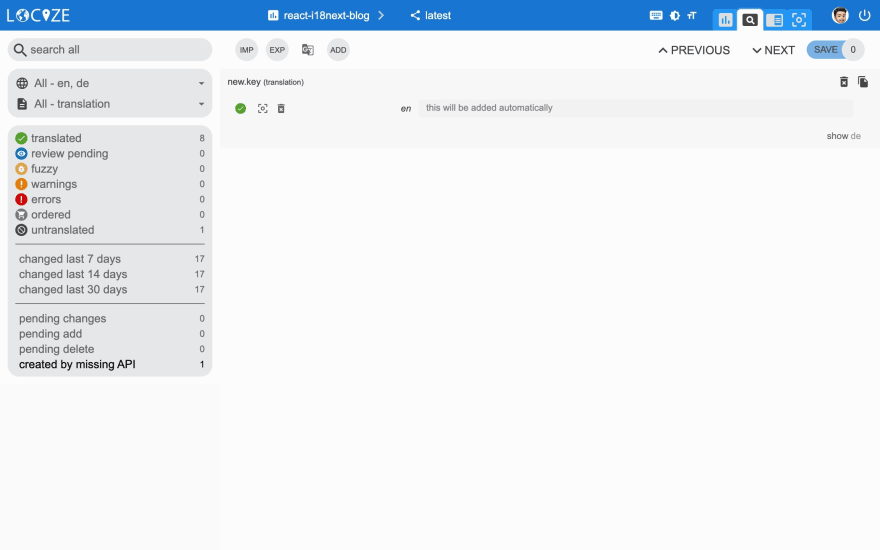
Cada vez que se use una nueva clave, se enviará a localizar.
Es decir:
<div>{t('new.key', 'this will be added automatically')}</div>
dará como resultado una ubicación como esta:
👀 Aún hay más…
Gracias al complemento locize-lastused, podrás encontrar y filtrar en locize qué teclas se usan o no .
Con la ayuda del complemento locize, podrás usar tu aplicación dentro del editor locize InContext.
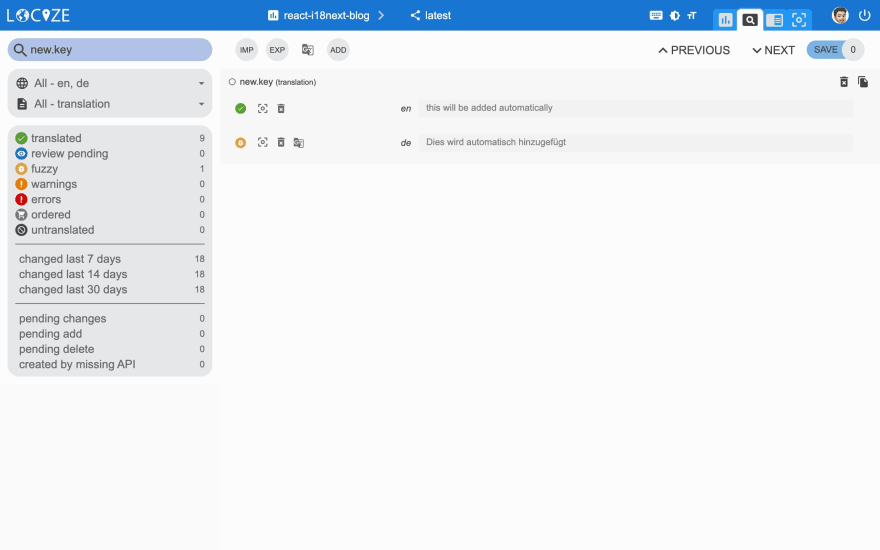
Gracias al flujo de trabajo de traducción automática automatizada y la funcionalidad saveMissing, no solo se agregan nuevas claves para localizar automáticamente mientras se desarrolla la aplicación, sino que también se traducen automáticamente a los idiomas de destino mediante traducción automática.
¡ Mira este video para ver el flujo de trabajo de traducción automática automatizada!
npm install locize-lastused locize
utilízalos en i18n.js:
import i18n from 'i18next';
import { initReactI18next } from 'react-i18next';
import LanguageDetector from 'i18next-browser-languagedetector';
import Backend from 'i18next-locize-backend';
import LastUsed from 'locize-lastused';
import { locizePlugin } from 'locize';
import { DateTime } from 'luxon';

const locizeOptions = {
  projectId: '0bbc223a-9aba-4a90-ab93-ab9d7bf7f780',
  apiKey: 'aaad4141-54ba-4625-ae37-657538fe29e7', // YOU should not expose your apps API key to production!!!
  referenceLng: 'en',
};

i18n
  // locize-lastused
  // sets a timestamp of last access on every translation segment on locize
  // -> safely remove the ones not being touched for weeks/months
  // https://github.com/locize/locize-lastused
  .use(LastUsed)
  // locize-editor
  // InContext Editor of locize
  .use(locizePlugin)
  // i18next-locize-backend
  // loads translations from your project, saves new keys to it (saveMissing: true)
  // https://github.com/locize/i18next-locize-backend
  .use(Backend)
  // detect user language
  // learn more: https://github.com/i18next/i18next-browser-languageDetector
  .use(LanguageDetector)
  // pass the i18n instance to react-i18next.
  .use(initReactI18next)
  // init i18next
  // for all options read: https://www.i18next.com/overview/configuration-options
  .init({
    debug: true,
    fallbackLng: 'en',
    interpolation: {
      escapeValue: false, // not needed for react as it escapes by default
      // format: (value, format, lng) => { // legacy usage
      //   if (value instanceof Date) {
      //     return DateTime.fromJSDate(value).setLocale(lng).toLocaleString(DateTime[format])
      //   }
      //   return value;
      // }
    },
    backend: locizeOptions,
    locizeLastUsed: locizeOptions,
    saveMissing: true
  });

// new usage
i18n.services.formatter.add('DATE_HUGE', (value, lng, options) => {
  return DateTime.fromJSDate(value).setLocale(lng).toLocaleString(DateTime.DATE_HUGE)
});

export default i18n;
Traducción automática automatizada:
Último filtro de traducción utilizado :


📦 Preparación para producción 🚀
Ahora, preparamos la aplicación para pasar a producción.
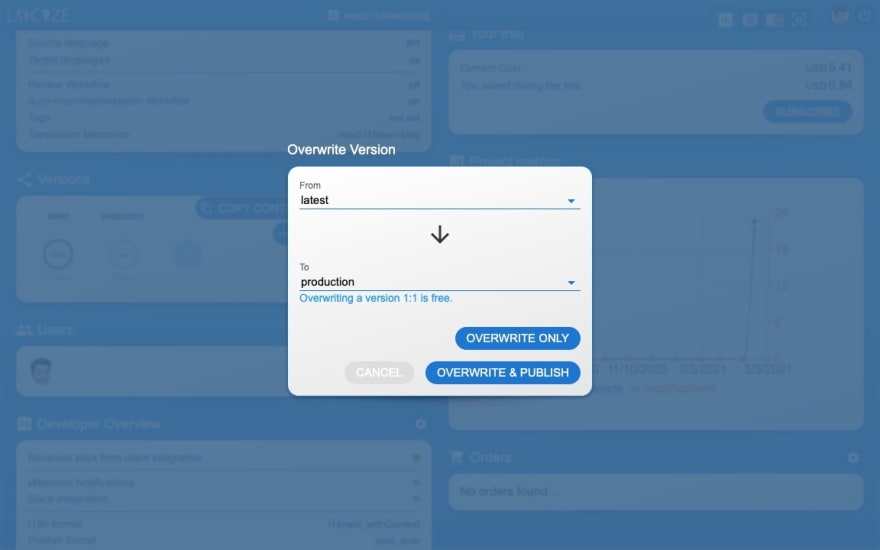
Primero en locize, crea una versión dedicada para producción. No habilites la publicación automática para esa versión, publícala manualmente o a través de API o CLI .
Por último, habilita Cache-Control max-age para esa versión de producción.
Hagamos uso de la función de entorno de react-scripts .
Vamos a crear un archivo de entorno predeterminado y uno para desarrollo y otro para producción:
.env:
SKIP_PREFLIGHT_CHECK=true

REACT_APP_VERSION=$npm_package_version

# locize
REACT_APP_LOCIZE_PROJECTID=0bbc223a-9aba-4a90-ab93-ab9d7bf7f780
REACT_APP_LOCIZE_REFLNG=en
.env.development:
REACT_APP_LOCIZE_VERSION=latest
REACT_APP_LOCIZE_APIKEY=aaad4141-54ba-4625-ae37-657538fe29e7
.env.production:
REACT_APP_LOCIZE_VERSION=production
Ahora adaptemos el archivo i18n.js:
import i18n from 'i18next';
import { initReactI18next } from 'react-i18next';
import LanguageDetector from 'i18next-browser-languagedetector';
import Backend from 'i18next-locize-backend';
import LastUsed from 'locize-lastused';
import { locizePlugin } from 'locize';
import { DateTime } from 'luxon';

const isProduction = process.env.NODE_ENV === 'production';

const locizeOptions = {
  projectId: process.env.REACT_APP_LOCIZE_PROJECTID,
  apiKey: process.env.REACT_APP_LOCIZE_APIKEY, // YOU should not expose your apps API key to production!!!
  referenceLng: process.env.REACT_APP_LOCIZE_REFLNG,
  version: process.env.REACT_APP_LOCIZE_VERSION
};

if (!isProduction) {
  // locize-lastused
  // sets a timestamp of last access on every translation segment on locize
  // -> safely remove the ones not being touched for weeks/months
  // https://github.com/locize/locize-lastused
  i18n.use(LastUsed);
}

i18n
  // locize-editor
  // InContext Editor of locize
  .use(locizePlugin)
  // i18next-locize-backend
  // loads translations from your project, saves new keys to it (saveMissing: true)
  // https://github.com/locize/i18next-locize-backend
  .use(Backend)
  // detect user language
  // learn more: https://github.com/i18next/i18next-browser-languageDetector
  .use(LanguageDetector)
  // pass the i18n instance to react-i18next.
  .use(initReactI18next)
  // init i18next
  // for all options read: https://www.i18next.com/overview/configuration-options
  .init({
    debug: true,
    fallbackLng: 'en',
    interpolation: {
      escapeValue: false, // not needed for react as it escapes by default
      // format: (value, format, lng) => { // legacy usage
      //   if (value instanceof Date) {
      //     return DateTime.fromJSDate(value).setLocale(lng).toLocaleString(DateTime[format])
      //   }
      //   return value;
      // }
    },
    backend: locizeOptions,
    locizeLastUsed: locizeOptions,
    saveMissing: !isProduction // you should not use saveMissing in production
  });

// new usage
i18n.services.formatter.add('DATE_HUGE', (value, lng, options) => {
  return DateTime.fromJSDate(value).setLocale(lng).toLocaleString(DateTime.DATE_HUGE)
});

export default i18n;
Ahora, durante el desarrollo, continuará guardando las claves que faltan y haciendo uso de la última función utilizada. => npm run start
Y en el entorno de producción, saveMissing y lastused están deshabilitados, y tampoco se expone la clave de API. => npm run build && npm run serve.

🧑💻 El código completo se puede encontrar aquí .
Consulta también la parte de integración del código en este video de YouTube .
🎉🥳 Felicidades 🎊🎁
Espero que hayas aprendido algunas cosas nuevas sobre i18next, la localización de React.js y los flujos de trabajo de localización modernos.
Si deseas llevar tu proyecto i18n al siguiente nivel, vale la pena probar locize.
Los fundadores de locize también son los creadores de i18next por lo que con el uso de locize, apoyas directamente el futuro de i18next.